Showing posts with label Salad. Show all posts

Friday, July 25, 2014

Fresh off the Cob Corn Salsa

If you live in or near Ohio in the summer, fresh corn is on the menu. Over the years it has been consumed at our table, mostly, on the cob. However, my children don't eat corn like I did so there is often leftover. I'm more a fan of reusing leftovers in another dish than reheating, but whether you cut it off the cob or use frozen or canned corn kernels, this is a great way to serve corn. I used cherry tomatoes fresh from my garden in this batch.

Corn Salsa combines black beans and fresh tomatoes to make a tasty topping to Taco Rice Salad or corn chips. For me, it's really about the cumin and lime-- I'll eat most anything with that combination. Try it!

Fresh off the Cob Corn Salsa

Ingredients
Corn-- Fresh, frozen, or Canned, cooked and cooled, 1 1/2 cups
Cooked Black Beans, cooled and rinsed, 1 1/2 cups
Fresh Tomato, diced,  2 large
Sweet Onion, diced, 1 small
Fresh Cilantro, chopped, 3 Tbsp
Fresh Lime Juice, 3 Tbsp (1-2 Limes)
Ground Cumin, 1/2 tsp
Salt, 1 tsp

Directions
Prep vegetables. Toss all ingredients together in a bowl. Adjust seasoning to taste. Serve with taco rice salad or eat with Shagbark Corn Chips.


Sunday, July 20, 2014

Ohio Summer Salad

Ohio Summer Salad should be made with fresh garden produce. It tastes best when made a few hours ahead of time or even with a day ahead so that the flavors can meld. My grandmother seemed to keep the same jar going all summer. It is great served with grilled meat, fresh bread, and corn-on-the-cob. It has long been a summer family favorite.

Ohio Summer Salad
Serves 6

Ingredients
  • Cucumber,  2, wash, peel, cut into rings
  • Sweet onion, 1 medium, sliced
  • Ripe Red Ohio River Tomatoes, 2 large, cut into chunks
  • Green Pepper, 1, rinse, remove seeds, cut into thin slices and then half
  • Salt, 1 1/4 tsp
  • Fresh Ground Black Pepper, about 8 cranks— enough to form a disc on the top
  • Sugar, 1/2 Tbsp
  • Cider Vinegar, 1 cup
  • Vegetable Oil, 4 Tbsp (use a light oil with little flavor— no olive oil)
Directions
  1. Wash and cut vegetables.
  2. Place vegetables into a large bowl. 
  3. Add salt, pepper, and sugar.
  4. Pour cider vinegar and vegetable oil over the top, should just reach the bottom of the vegetables.
  5. Toss all together.
  6. Adjust to taste— should taste vinegary.
  7. Set aside to macerate for 1 to 3 hours.
  8. Toss before serving.
  9. Store leftovers in fridge in a jar— it gets better!

Thursday, July 17, 2014

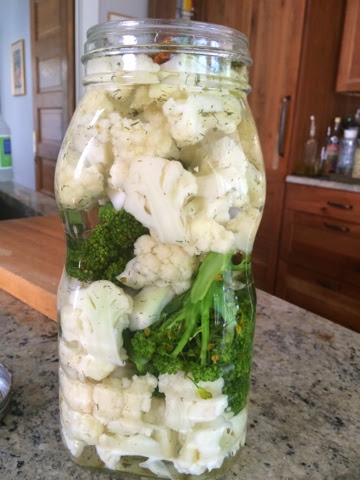
Eat Your Vegetables: Quick Pickles

Determined to eat well, we tramp off to the market, buy handfuls of luscious vegetables, and then we stuff the things into the crisper. Later, the once beautiful produce is wilted and no longer looks appetizing. The old veggies are composted, tossed, or maybe made into soup?

Having trouble keeping your vegetables in the edible state? Want another way to add vegetables to your diet? Japan to the rescue!

Pickles of varying types are traditionally eaten at every meal in Japan, yes, that includes breakfast. I had previously thought of pickling to be about cucumbers and water baths, but there is more to pickling, and quick pickling is a handy food preservation method. My cooking teacher, Nansai Sensei, demonstrated how to make quick pickles using a variety of vegetables all mixed together in a jar. This is a variation of her recipe then modified for the American pantry.

You can make and eat quick pickles the same day, though they do have a more intense flavor over time. It allows fresh produce to be stored in a ready to eat state that lasts beyond the usual day or two, and it adds texture and the zingy taste of vinegar to your palate.

Vegetables are best when cut into uniform shapes which is helpful for absorbing flavor. Some vegetables, such as cauliflower, beets, broccoli, carrots, and green beans, need a quick boil (1 to 2 minutes) followed by immersion into cold water to stop the cooking process, drain, and place into the hot pickling juice.  (TIP: Cauliflower will stay whiter if boiled with a slice of lemon).

Improvise with spices, use different types of vinegar, and tweak the recipe to your liking. Store quick pickles in a glass jar in the fridge up to 10 days. Now you can add vegetables to your lunch or easily eat them as a snack right out of the fridge. Heck, I serve them at parties. Combine the pickled vegetables with fresh vegetables for a textural and flavorful contrast in a salad.

Enjoy!


Eat Your Vegetables Quick Pickles
Yield 4 pints or 2 quarts

Useful Equipment
Clean glass jar with lid, pint or quart size

Ingredients for Pickling Juice
Water, 1 quart (4 cups)
White Vinegar, 2 cups
Sugar, 1/3 cup
Pickling or Kosher Salt, 2 Tbsp

Spice Options
Pickling Spice Mix, 1 tsp per pint jar
Dried Hot Red Pepper, 1 per jar (optional)
Bay Leaf, 1 per jar (optional)
Clove of Garlic, 1 per jar (optional)
Mustard Seeds, 1/2 tsp per jar (optional)
Ball Pickle Crisp, 1/8 tsp per pint jar, 1/4 tsp per quart jar (optional for cucumbers, beets)

Vegetable Options
  • Cucumber, wash, cut in half, cut to fit into jar
  • Carrots, wash, peel, cut in sticks, boil 1-2 minutes, plunge into cool water, drain
  • Cauliflower, wash, chop into pieces, boil 1-2 minutes with slice of lemon, plunge into cool water, drain
  • Turnips, wash, quarter, boil 1-2 minutes, plunge into cool water, drain
  • Beets, wash, chop, 1/4-inch slice, boil 1-2 minutes, plunge into cool water, drain (store by themselves-- turns the juice pink)
  • Green Beans, trim ends, wash, boil 1-2 minutes, plunge into cool water, drain
  • Daikon Radish, peel, slice into half moons, boil 1-2 minutes, plunge into cool water, drain
  • Asparagus, trim ends, wash, chop, boil 1-2 minutes, plunge into cool water, drain
  • Garlic, boil 1-2 minutes, remove peel and separate cloves
Directions
  1. Clean and prep vegetables.
  2. Add pickling spices and vegetables to jar(s). 
  3. Bring pickling juice ingredients to boil over medium heat, stir until sugar and salt dissolve.
  4. Pour hot liquid over prepared vegetables in clean jars. 
  5. Add pickle crisp (if using) to each jar of cucumbers, beets, etc.
  6. Label jar.
  7. Wait about 30-45 minutes before eating. Store in the fridge up to 10 days.


Thursday, May 2, 2013

Taco Rice Salad

I admit it. I lived in Japan too long-- I want rice in my taco salad! My friend Kendo Mama, introduced me to it, and it's a keeper.

Taco Rice Salad
It's not on any local restaurant menus, although, Casa does accommodate my requests with their vegetarian chili taco salad. However, the original is served without beans and tofu. The difference in taste has meant that I kept thinking about it.

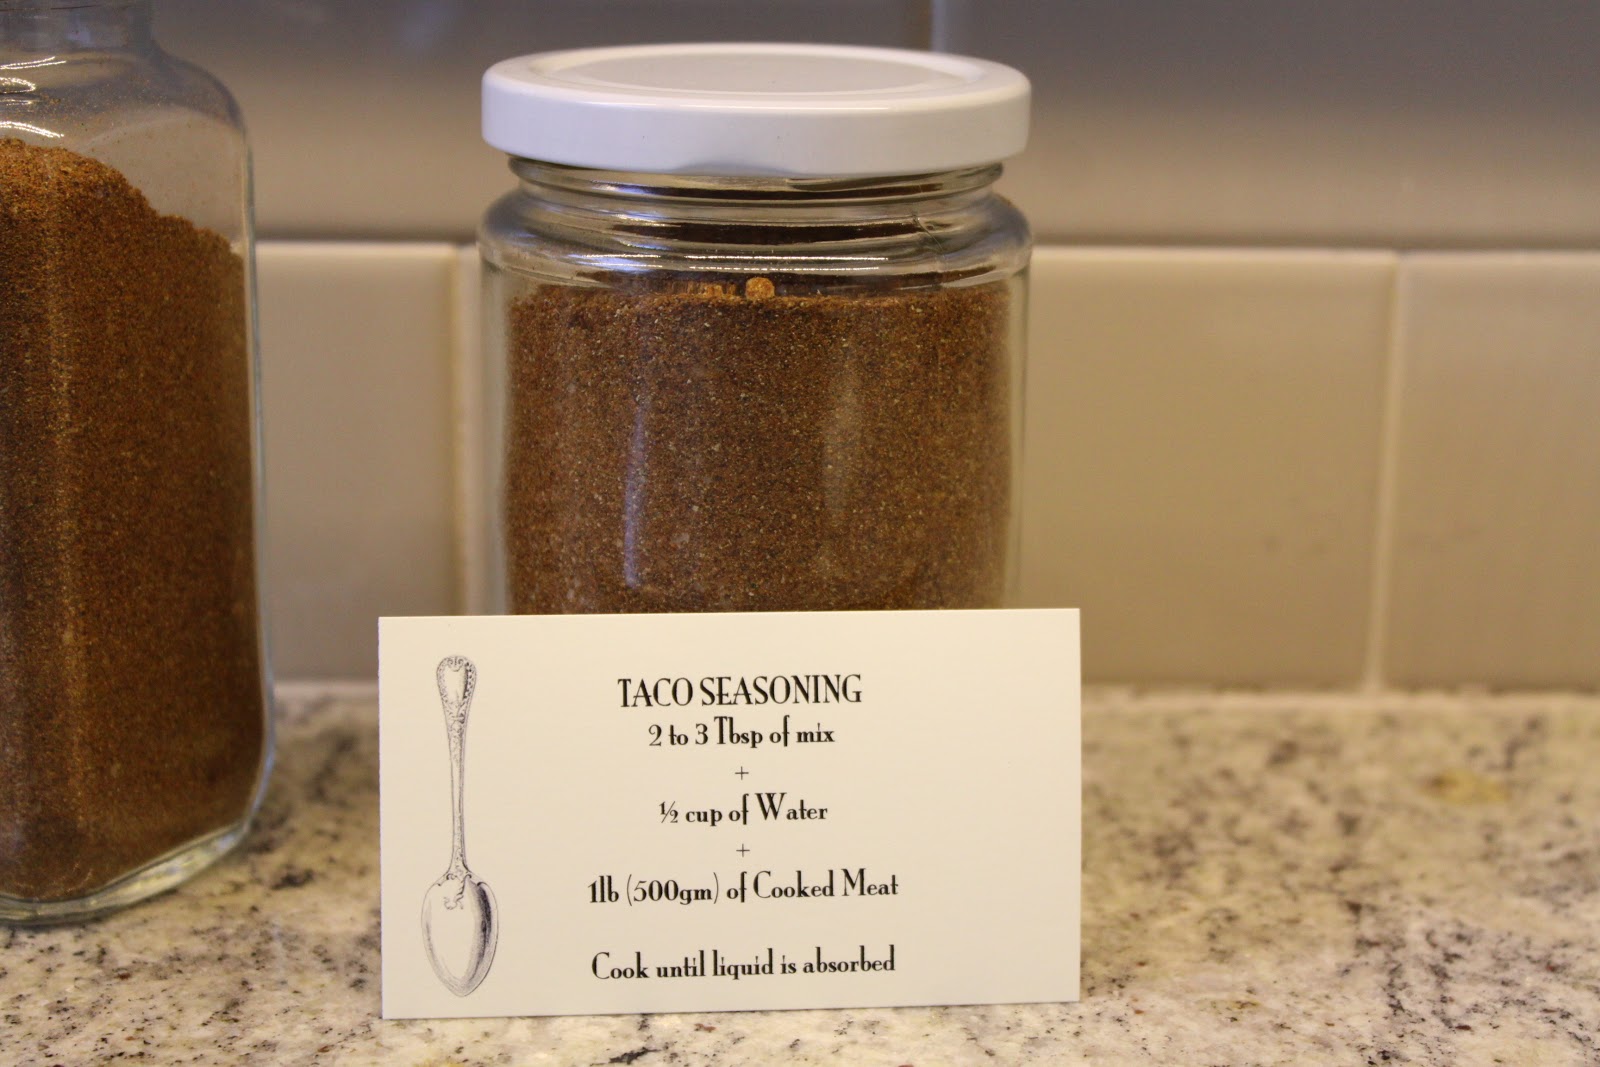
The taco seasoning was the rate limiting step; I couldn't bring myself to buy a package of processed taco seasoning from El Paso even if it did taste good in my friend's salad. Finally, I did a Google search and found this recipe for homemade taco seasoning. I, ah, made alot.

I wanted to send some to Kendo Mama to try, plus a few Kodomo no ni Children's Day packages have arrived from Japan. I have some thank-yous to send out, and a little homemade taco seasoning is just the thing to spice it up.

The best part about the homemade taco seasoning? Taste is great and there are no preservatives nor any other unnecessary gunk in it. I had to ride my bike twice to the Farmacy to get enough chili powder which just means that this batch is half organic, one of the quirks of living in the hills of Ohio.

This is the recipe for the Taco Rice Salad I ate at my friend's house in Japan. Vegetarians could try the seasoning with tempeh or tofu. I did use salsa instead of tomatoes-- it's not quite tomato season here yet. I had forgotten how pleasant it is to have the warm rice and ground beef with the cool crunchy lettuce.

I served each layer separately so that the kiddos could make dinner their way. It was a win all the way around the table. My husband was absent, but he'll eat my worst mistakes and say, "I'm just happy there's food on the table." I love cooking for him, it's the two kids who wrack my brains. Try this at your table. Use the link to make the seasoning-- I can vouch for the recipe.

Idatakimasu I humbly receive,
Kim


Homemade Taco Seasoning
Ground Beef cooked with taco seasoning and water

Taco Rice Salad
Adapted from Aya Tambata

Ingredients
Hot Cooked Japanese Rice or whatever kind you like
Cooked Ground Beef + Taco seasoning + Water-- cook until water evaporates
Mexican Mix or Monterrey Jack Cheese, grated
Lettuce, shredded
Salsa or Diced Tomato
Avocado, sliced
Corn Chips, crushed
Fresh Cilantro, 1 to 2 springs, for garnish
Hot Sauce, for garnish

Directions
  1. Cook the rice. 
  2. Saute the ground beef until browned. Add taco seasoning and water. Cook until the water is evaporated, stir often. Set aside.
  3. Prep vegetables: lettuce, tomato if using, avocado, and cilantro.
  4. Layer lettuce, rice, beef, cheese, avocado slices, corn chips, tomato or salsa, and garnish with a spring of cilantro and hot sauce to taste.

Thursday, March 21, 2013

Millionaire Chicken Salad


The ladies who lunch came over today and ate chicken salad. Ok, so it was potluck at my house. I made my favorite chicken salad recipe courtesy of my mother-in-law. Potluck is fun for trying new recipes and for actually taking the time to eat lunch with company. I rarely eat lunch in any defined manner as I tend to work until I'm starving and then scarf something down to refuel before round three. Round three is the after school part of my day with children who generally become extremely distractible and off target just as they arrive home with homework to do. I digress from the salad.

It is best with crisp ice berg lettuce but I like butter (Boston Bibb) lettuce and used that today. The dressing is what turns the conventional chicken salad ho hums into, "Mmm, I want that recipe!" Try it.


Millionaire Chicken Salad
Adapted from my mother-in-law’s recipes from Taiwan. 

A knob of ginger comes from a fresh piece of ginger root. The knob sizes range from ½-inch to 2-inches and are covered in a tan colored papery skin. Break off a knob, remove the skin, and then grate, chop, or slice as you like. I estimate a 1-inch knob in my recipes, but I like ginger. Adjust to your taste by using more or less.

Ingredients
Chicken breast, 1 piece, boiled, shredded
Fresh Ginger, ½ knob, sliced

Dried Szechuan Peppercorns, 1 tsp, sift to remove hulls
Peanut oil, 3 Tbsp
Garlic, 1 clove, peeled & zested
Fresh Ginger, 1 knob, peeled & zested
Dried Red pepper flakes, ¼ tsp
Honey, 2 Tbsp
Soy Sauce, 4 Tbsp
Salt, ½ tsp

Lettuce, 1 head, chopped
Scallions or Green onion, 1 to 2 stalks, chopped, for garnish

Equipment
Mortar and Pestle
Fine Mesh Sifter
Zester
Small fry pan


What to do
  1. Boil chicken with ½ knob of ginger until chicken pulls apart easily, about 10 minutes. Allow chicken to cool down. Shred the meat, discarding any bones or skin and the ginger. 
  2. Use a mortar and pestle to crush the peppercorns and break them open. Sift out the shell fragments and other hard parts. Zest the garlic and ginger.
  3. In a small fry pan over medium to low heat, heat peanut oil, garlic, ginger, crushed peppercorns, and red pepper flakes until fragrant, about 2 minutes. Stir in honey, soy sauce, and salt. Turn off heat.
  4. Wash, drain, and chop lettuce and green onion. On a serving platter, arrange lettuce and shredded chicken. 
  5. When ready to serve, reheat the dressing, about 2 minutes. Whisk and pour over the chicken and lettuce arranged on the serving dish. Garnish with chopped fresh green onions. Excellent served with Egg Rolls.
My children would rather be playing with Lincoln Logs and Playmobil

Wednesday, February 27, 2013

The Mediterranean Diet News

Diets, food fads, and "oh, don't eat this!" warnings annoy me. Most people can barely sit down to dinner at the table let alone navigate the admonishments of what not and what to eat. There is arsenic in your rice. Gluten in your wheat which whether or not you are actually allergic to it, most people believe it is better if you don't eat it. Carbs versus no carbs? Soy is a killer. Peanut butter is contaminated. Nothing is safe to eat and this kind of news is exhausting!

Except that my years on the cardiac wards of various American hospitals told me a different story. That story is about processed food, slabs of meat, and no time and no clue as to what to do with real food when or if it was found. There was also stress, tobacco, out of control blood pressures, no regular visits to the doctor, and a whole host of other problems.

Part of my job was to talk about diet. In Washington, DC, I talked to a young guy in his thirties and just over three hundred pounds about his lunch routine of fast food. He asked me, "Where am I going to get the kind of food I am supposed to eat?" He was looking at my deck of cards that represented the portion size of meat he should eat per day as opposed to the size of a burger patty he ate at one meal most days. My answer, "You have to take your lunch. You have to cook." He agreed with me. I wonder how he's doing?

People watch cooking shows on TV but don't cook. There are kitchens decked out with the latest Home Depot bling and the only thing used? Ching ching, as my Japanese friends call the microwave oven. You can know a lot about food, but eventually you have to start cooking it.

Cooking takes time, experience, and if you want to have it at certain times, some kind of plan. And then there is that whole thing about, "What's for dinner?" What should you be cooking?

Today I listened to a guy in line at the post office riffing about the kinds of beers everyone orders these days. He asked, "Who remembers Bud!" He's obviously missed the blog or he'd know "we’re all a lot weirder than we used to be." Budweiser probably misses those days too, but the local brewers probably don't. Personally, I was standing in-line silently grateful for the twenty varieties of beer I can find around town.

This brings me to some welcome news just published by The New England Journal of Medicine. I stumbled across an article on The New York Times app on my widget. I had to read this part aloud to my husband who knows first-hand of my disregard for the diet industry, "The study ended early, after almost five years, because the results were so clear it was considered unethical to continue." The mediterranean diet-- beans, peas, lentils, vegetables, fruits, extra olive oil and nuts, small portions of white meat, and alcohol in moderation (one a day)-- is good for you. Woohoo! It does limit commercially made cookies, cakes, pastries, as well as dairy products and processed meat, but at least it gives us all some place to go that doesn't involve heat but includes fat.

Elizabeth Andoh's TED talk adds another easy tip-- go for the five colors. There is no measuring, no weighing, just try to eat food that has these five colors-- red, green, yellow, black, and white.

One last thing, if you're in need of some cooking inspiration or where to find some food color, you might try Dirt to Fork. We could get inspired together.


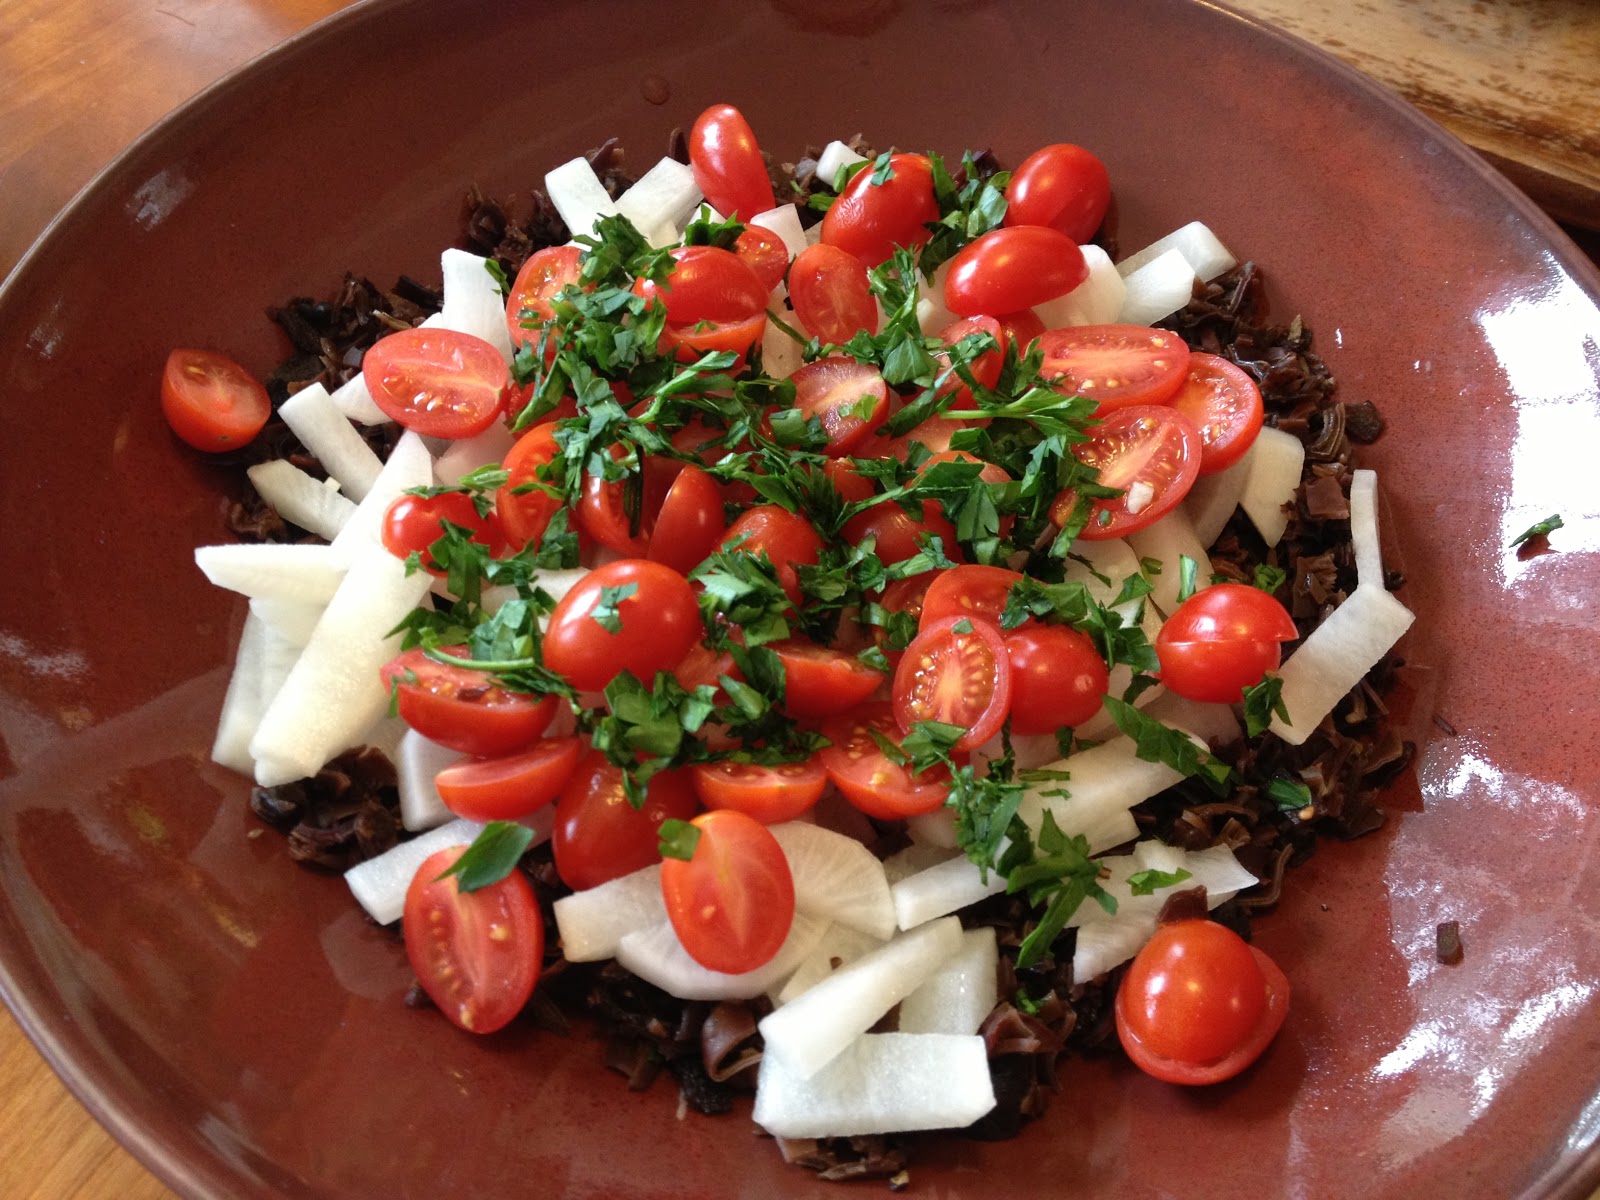
Daikon Salad
Adapted from Aki Nansai

Serves 4

Ingredients
Garlic, 1 clove, zested
Spicy oil, a bit, ½ tsp
Sugar, ⅔ Tbsp
Rice Vinegar, 3 Tbsp
Sesame oil, ½ tsp
Salt, ½ tsp
Dried Tree Ear “kikurage,” ½ cup dried (soften in hot water + pinch of salt), chopped
Daikon Japanese Radish, 1 small cut into fine sticks
Tomato, 2, cut into wedges or 1 cup of cherry tomatoes halved
Fresh Cilantro, a few sprigs, wash, remove stems, chop leaves
Dried Goji or Wolf berries, a handful for garnish

What to Do
  1. Mix dressing- garlic, spicy oil, sugar, vinegar, sesame oil, & salt. 
  2. Soak tree ear in warm water with a pinch of salt until soft, then drain and cut.
  3. Peel Daikon, cut into 4 sections lengthwise, then cut into 3 sections, and then cut each section into small sticks.
  4. Use half of the dressing on the daikon sticks. 
  5. Use other half of dressing to marinate tree ear. 
  6. On a platter, layer daikon, tree ear, & tomatoes.
  7. Garnish with cilantro & berries.
  8. Toss Salad and serve.


Daikon Salad (white) with tree ear (black), tomatoes (red), & parsley(green)


Saturday, February 9, 2013

A Recipe: Hijiki & Barley Salad

In search of recipes that use hijiki, a seaweed or sea vegetable used in Japanese cooking, I found a barley, edamame, & hijiki salad recipe by Deb at Kahakai Kitchen. I adapted the recipe with hulled barely, more miso, and punch of lemon zest as I prefer a stronger citrus taste, must be all those years in Florida. It's more fusion than Japanese, but it's very tasty and it has a nice crunch not to mention plenty of health benefits.

This recipe evolved because I wanted to teach students recipes that use hijiki. I was glad for the students and glad for the push to search out and find a new recipe. Cooking class is not about recipes, it's more about slowing down and making time to cook together. Try cooking class, not because you like the recipes, but because playing with food is fun and it fuels the creative spirit, for both of us. You will learn something to takeaway beyond the recipes.

The world gives and the world gets. Here, take, and pass it along, my version of Hijiki & Barley Salad:

Hijiki with Barley Salad and Miso-Ponzu Dressing
Adapted from Deb Kahakai Kitchen
Serves 4 to 5

Salad Ingredients
Cooked Hulled Barley, 1 cup
Cooked Edamame, 1 cup
Dried Hijiki, 5 gm/~2 Tbsp (rehydrate by soaking in water)
Carrot, 1 medium, julienned
Seedless Cucumber, ½ or 1 small, julienned (if it has seeds, remove them)
Sesame seeds, 2 Tbsp, toasted
Miso Dressing (see recipe below)
arugula or spinach to serve salad on (optional)

Miso Dressing
White miso, 3 Tbsp
Olive Oil, 1/3 cup
Rice vinegar, 2 Tbsp
Ponzu, 2 Tbsp
Lemon juice & zest, 2 Tbsp of juice & zest
Fresh Ginger, 1 Tbsp minced or ground
Sesame oil, 1 Tbsp
Black Pepper, several cranks or ¼ tsp


What to Do

  1. Soak (overnight) hulled barley. Rinse, cover in 2-inches of water, and cook in until tender at a lower simmer, about 35 minutes. Drain, set aside to cool down.
  2. Cook edamame according to package instructions (I used frozen), drain, set aside.
  3. Rehydrate hijiki in a bowl of water until tender, about 15 minutes. 
  4. Toast sesame seeds in a dry pan over low flame, about 3 minutes, stirring the seeds or shaking the pan to prevent scorching. Remove from heat and set aside.
  5. Prep vegetables. 
  6. Whisk together dressing ingredients, adjust to taste; set aside.
  7. Combine barley, edamame, hijiki, carrot, cucumber and sesame seeds in a bowl. Add about half of the dressing and mix gently but thoroughly. Adjust to taste, adding more dressing as needed.
  8. Place arugula or spinach on a serving plate and top with hijiki mix. Serve cold or at room temperature with extra dressing.
Happy cooking!

Hijiki Barley Salad